
But of course there is always a catch, getting to this point has taken longer than we had anticipated and we are behind schedule for a very important deadline. Many months ago, we promised that we would donate Hull #1 to be auctioned off at the Sportsman's Club of Fort Worth 57th Annual Wild Game Dinner. This annual dinner is where a couple hundred of our like mind friends get together to raise money for outdoor education and the club is counting on having our production prototype at the dinner to generate lots of excitement for the auction. If we don’t get this boat built, and outfitted by February 27th we will have nothing to display before the auction. This would be a huge missed opportunity for both Caddo Boats and the Sportsman club.
So with our deadline looming, we have to get this boat built and back to the shop in Texas so that we can get the hardware, motor and electronics installed before the 27th. Since this is our first build we can only guess at exactly how long it is going to take to finish the boat. We have talked to experts, we have built detailed construction timelines, but our schedule is tight and we have a long way to go.
Friday, Jan 31st (28 days to go)

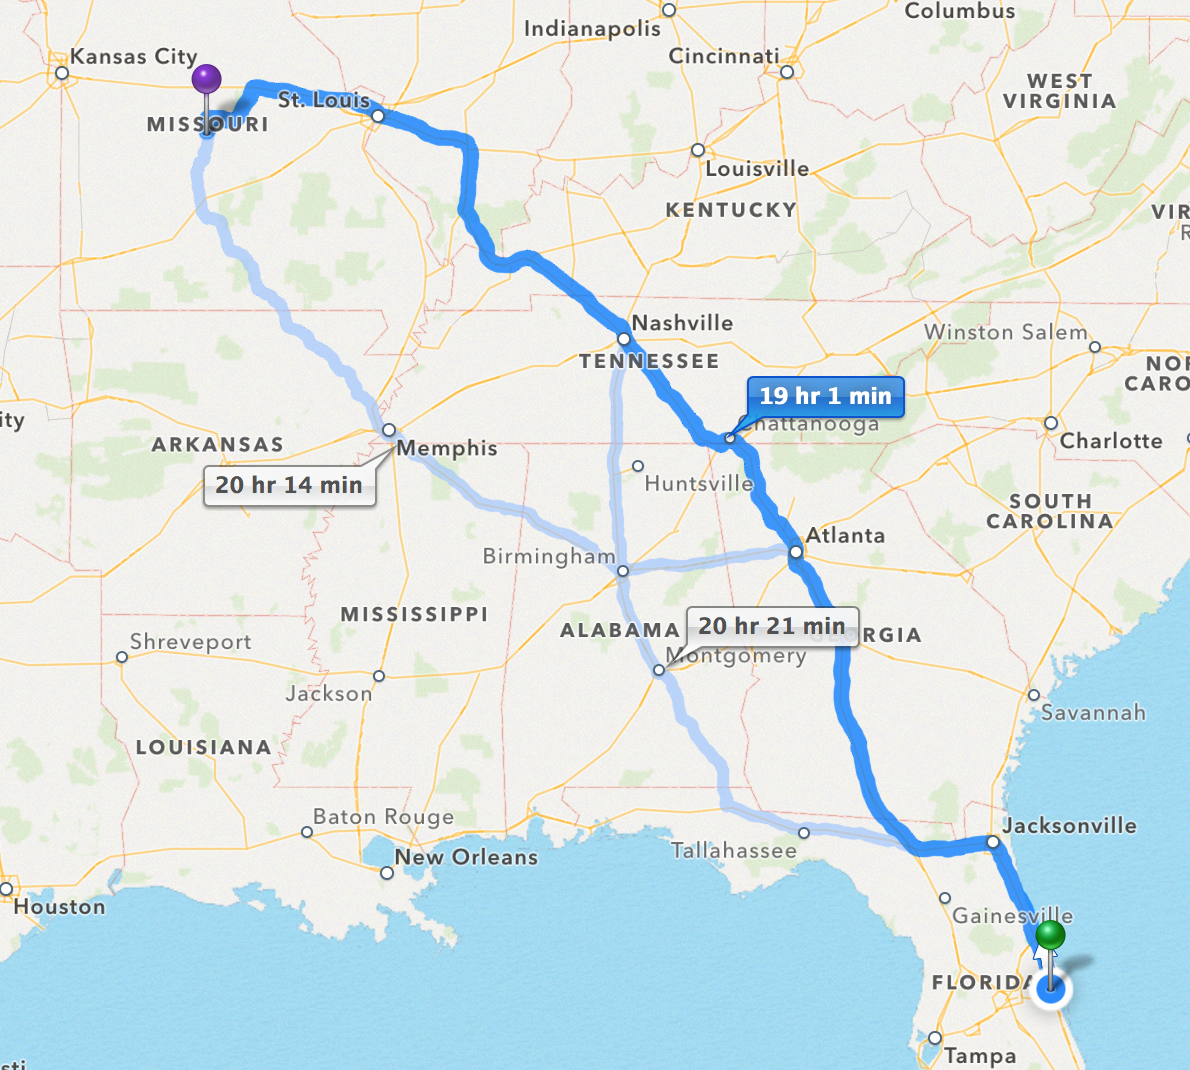
We are scheduled to start construction on Monday in Florida. Our molds are ready and the team is in place, but first we have to take a detour through Lebanon, Missouri to pick up our first trailer. The experts at Mid America Trailer have designed and built us a custom trailer for our Caddo 14’. We need this trailer to get the prototype back to the shop in Texas. The 10 state road trip is on!
It is 537 miles from Fort Worth to Lebanon and we need to get there before everyone leaves for the weekend. Google maps tells us that it is going to take 8 ½ hours to get there, but we make it by early afternoon and our treated to the our first milestone. Our trailer is complete and looks great! Mid America has built us a top of the line fresh water trailer complete with LED lights. It is the first actual completed part of this project and we are pretty excited to have it connected to the back of the Suburban!


None of us on the team ever thought that we would see the inside of a Ryan’s in our lifetimes, but here we were. Maybe it was the 14 hours and 919 miles on the road, or maybe the excitement of starting a new adventure but we all agreed that it was a damn fine meal.
Saturday, Feb 1st (27 days to go)
Day two we spent driving the back roads of Tennessee, Alabama, Georgia and Florida. After 12 hours and 752 miles, with our destination in sight, we decide to stop for the night in Live Oak, Florida. To continue with the theme we did find a fabulous family cafe in Jasper, FL that was very good. Diners, Drive Ins and Dives have nothing on us!
Sunday, Feb 2rd (26 days to go)
The road trip is over! We have arrived in Titusville and are ready to start work in the morning. We all agree that long road trips were much funner in college, but we cannot remember exactly why???
Monday, Feb 3rd (25 days to go)
We arrive early at Vectorworks to begin construction of the prototype, at least we thought it was early. Come to find out that the production specialist start working at 4am in the morning. We’re still not sure why, maybe it gets hot in the summer in Florida, or maybe these guys are just crazy, but if it doesn’t involve sitting in a deer stand at day break we rarely see 4 in the morning!
Our contract with Vectorworks gives us two weeks to build our first boat. But that is a bit misleading, because we have to have the boat to Imanna Labs in Rock Ledge, FL for coast guard certification by Monday, Feb 10th. So we have to have the boat assemble and seaworthy by early next week.
 Vectorworks sits on the shore of the Indian River. To us Texans it looks more like a bay than a river, but the locals assure us it is a river. Directly across the river is the Kennedy Space Center. We all rush to spaceflightnow.com to see if there are any upcoming launches, we would have a birds eye view from our location at Vectorworks, but sadly nothing is scheduled for our two weeks here. We hear stories about how the shuttle would fly over the plant on it’s way to landing, that sure must have been something to see.
The first step in producing a fiberglass boat, is the waxing of the the molds. The wax keeps the fiberglass resin from sticking to the mold, allowing for the mold to be easily removed. This is very critical, if for any reason something doesn’t get waxed, or there is a problem with wax, the fiberglass part will stick to the mold. If the fiberglass sticks to the mold you will tear up the mold or the fiberglass part getting it out. This would NOT be good!
The next step is to spray the molds with gel coat. This will become the outer layer of the hull, deck and other parts of the boat. Gel coat provides the color and so we essentially paint the boat first before it is even built. Our plan is to be able to produce our Caddo boats in just about any color the buyer wants. But for our prototype we are going to go with a glossy white color. The gel coat layer is 20 mils (thousandths of an inch) thick and very smooth and shiny when it drys.
You then let the gel coat set up until it is slightly sticky. Then we began covering the molds with a 2 ounce chop strand mat. This is the first of three layers of fiberglass. The fiberglass mat comes in rolls like cloth. You lay the fiberglass down, roll it into all of the corners of the mold and coat it with a layer of resin.
It is at this time we learn our first VERY important lesson. As the resin cures it gets hot. If you put too much resin down it gets real hot. Real hot melts wax. Wax is what stands between us and a part that is permanently affixed to the mold. As stated above, this is VERY BAD!
We have the following parts that have to be made:
1 - Hull
1 - Deck
1 - Console
1 - Console Lid
2 - Small Hatches
5 - Large Hatches
6 - Tubs
1 - Rod Locker
Tuesday, Feb 4th (24 days to go)
Every piece of fiberglass mat is laid down, hand trimmed and rolled with resin. This is a very time consuming process and one that we will repeat 3 times as we build out the parts. Between layer 2 and 3 of the fiberglass we insert what is referred to as “The Core”. This material is a foam like board that adds strength but very little weight. Each piece is hand cut and sandwiched between a layer of resin and the final layer of fiberglass mat.
Wednesday, Feb 5th (23 days to go)
All of the parts are now complete. After three long days we have all of the parts curing in the molds. Tomorrow is the big day, when we see our parts start to look like the boat we have been dreaming about for the last year!
Thursday, Feb 6th (22 days to go)
It is time to pop the parts out of the molds. This is a fairly simple procedure. You simply grab the sides of the part and gently pull it from the molds and out comes a finished fiberglass part. No problem right? WRONG…
Everything was going smoothly. The hatches popped right out. The tubs looked good. Even the massive hull came right out of its mold. But then we tried to remove the deck. This is a 14 foot by 7 foot single piece of fiberglass. Between the deck and the mold we are talking about almost a thousand pounds of material and it would not budge. Ten of us tried desperately to pull the deck out of the mold, but it was not coming out.
The Vectorworks experts gathered around and decided upon a plan. We drug the mold and the deck to another one of the buildings that contained a 20 ton crane. We inverted the mold, and lifted it into the air. We then had 10 people all around the edges of the mold put all their weight into pulling down on the deck. Finally after 2 hours of pulling, prying and begging, with a great ripping sound, the deck came out of the mold. Parts of the mold were left on the deck, and parts of the deck were left on the mold. As alluded to above, this is a very bad thing.
Upon review it became apparent that the wax had melted in some of the deep crevices where the below deck storage bins would be cut out of the deck. There are several theories about what happened. Some think that some acetone might have got into the mold when the deep crevices of the mold were hand painted with a brush causing the wax to break down. Another theory was that the resin was applied to thickly in these crevices and the wax melted due to the heat. Regardless of why it happened we did learn a VERY important lesson. One that we are glad that we encountered on this prototype and that we will carry with us as we go into full production.
Friday, Feb 7th (21 days to go)
We spent most of the day fixing the deck. The places where the deck had stuck to the mold required the team to sand them down and re-fiberglass the outer layer. Thank goodness for the fiberglass expert at Vectorworks. They taught us all the tricks for repairing fiberglass. Hopefully we will never need these tricks during production, but we are sure glad that we had these guys around to teach us what to do if it should happen. Once complete, the deck looked great! It was so exciting to see all of the parts laid out and ready for assembly.
The team also went to work installing bulkheads in the hull. Adding the thru-hulls for the drains. Reinforcing parts of the deck and cutting flotation foam to be installed in the hull for extra buoyancy.
Saturday, Feb 8th (20 days to go)
Today Vectorworks sent over their gel coal specialist. This guy is the master of gel coat. Since we had damaged the gel coat layer on the deck and console, we had to have him reapply gel coat to these parts. Doing so was more of an art than a science and he definitely had the touch of an artist.
He first applied a layer of gel coat over the damaged areas. He then used an 800 grit sandpaper to smooth in the gel coat with the undamaged areas. When he was done, you could not tell the repair had been made. It was an impressive feat and we now had all of the parts ready for assembly.
Sunday, Feb 9th (19 days to go)
Today our plan was to install all of the hardware on the boat and dry fit the deck to the hull. We then ran into our next problem. Even with highly detailed drawings, the tubs did not fit neatly into their cutouts in the deck and the lids were built up to much and did not close properly on their tubs. After about 4 hours of sanding and grinding, we were able to get the lids and tubs to fit properly in the deck and get all of the hardware installed on the deck. It really looked like the deck of a boat, our boat. No longer was it a drawing in the computer. We had a completed deck that looked better than we had dreamed!
But that was not the end of our Sunday adventure. Now it was time to dry fit the deck to the hull. Theoretically, we should simply lift the deck onto the hull and it would slide down on the hull perfectly. Well even the best computer programs in the world can’t predict where people are going to get a little sloppy with the fiberglass. So more sanding was required. After about 3 hours of sanding and fitting, the deck still would not fit down on the hull properly.
We closed up the shop on Sunday stumped and a bit dejected. We were hoping to see the boat in it’s final form, but no amount of sanding and grinding would make the deck sit properly on the hull. Tomorrow we are going to have to call in the experts to help us determine what needs to be done to correct this problem. We have to have the boat to the float testing facility no later than Tuesday, so hopefully we can solve the problems tomorrow.
Follow our daily progress on our Facebook page at www.facebook.com/caddoboats.
Come visit our website at www.caddoboats.com
Follow our daily progress on our Facebook page at www.facebook.com/caddoboats.
Come visit our website at www.caddoboats.com


